Quick Answer
Master hollandaise without a double boiler! Learn the easy hollandaise sauce blender method and microwave trick for perfect, creamy sauce in under 5 minutes.
Practical note
For How to Make Perfect Hollandaise Without a Double Boiler, this guide centers on Egg Yolks, Butter, Acid. Those are the checkpoints we would use first in a normal home kitchen before making a bigger change.
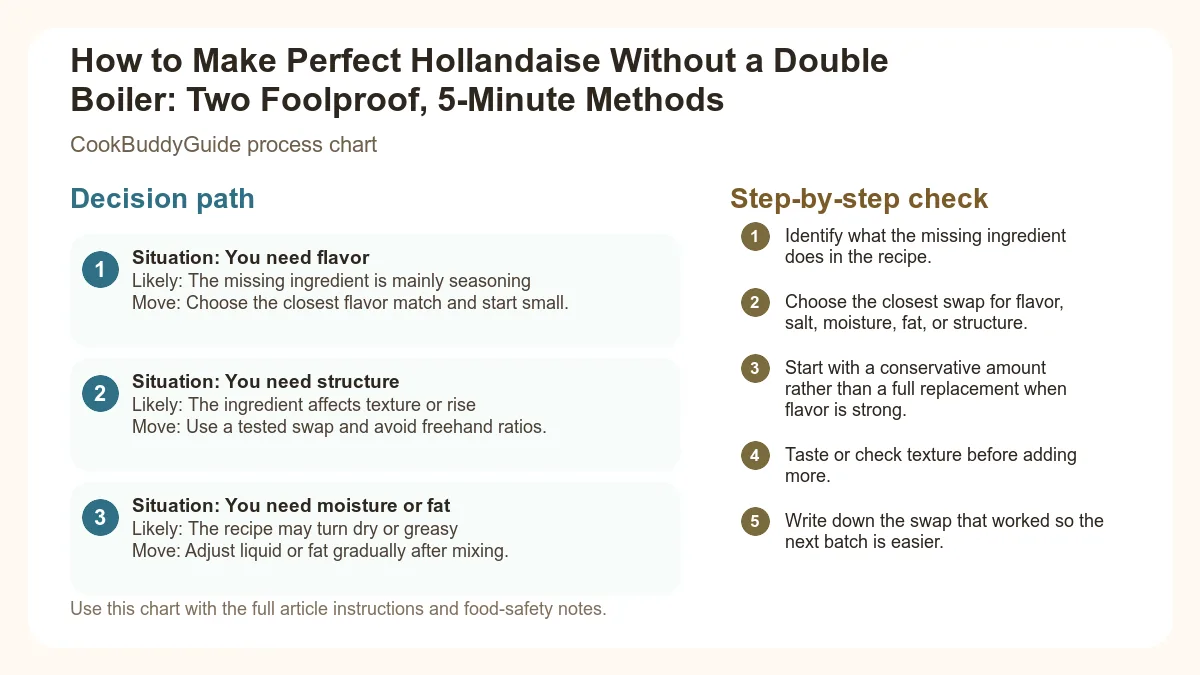
Decision table
| Situation | Likely cause or meaning | Best move |
|---|---|---|
| You need flavor | The missing ingredient is mainly seasoning | Choose the closest flavor match and start small. |
| You need structure | The ingredient affects texture or rise | Use a practical swap and avoid freehand ratios. |
| You need moisture or fat | The recipe may turn dry or greasy | Adjust liquid or fat gradually after mixing. |
Step-by-step fix
- Identify what the missing ingredient does in the recipe.
- Choose the closest swap for flavor, salt, moisture, fat, or structure.
- Start with a conservative amount rather than a full replacement when flavor is strong.
- Taste or check texture before adding more.
- Write down the swap that worked so the next batch is easier.
Common mistakes
- Replacing a strong ingredient 1:1 before tasting.
- Choosing a flavor match when the recipe actually needs structure.
- Forgetting that salty swaps can change the whole dish.
- Adding extra liquid before the batter, dough, or sauce has time to hydrate.
Related topic hubs
Why You Don't Need a Double Boiler for Perfect Hollandaise
The traditional method of using a double boiler was designed for a time before we had precise temperature control and high-speed blades. The goal of the double boiler is to gently heat the egg yolks so they thicken without reaching the 180°F (82°C) threshold where they turn into scrambled eggs. However, this method is notoriously fickle. If the water touches the bottom of the bowl, the sauce breaks. If you stop whisking for ten seconds, it curdles.
The Science of Emulsification Simplified
At its core, hollandaise is an emulsion—a forced marriage between fat (melted butter) and water (lemon juice and the water content in eggs). These two usually hate each other. The peacemaker here is Lecithin, a natural emulsifier found in egg yolks. Lecithin has one end that loves water and one end that loves fat, allowing it to hold the two together in a smooth, velvety suspension.
The Myth of the Bain-Marie
The Golden Ratio: Ingredients for Success
- Egg Yolks: Use large, fresh, room-temperature eggs. The egg yolks are your primary thickener and emulsifier.
- Butter: Consider high-quality European-style butter (like Kerrygold). It has a lower water content and higher fat content, which leads to a richer creamy texture.
- Acid: Lemon juice acidity is traditional, but a teaspoon of white wine vinegar can add a sharp complexity.
- Seasoning: Beyond salt, a pinch of cayenne pepper seasoning is non-negotiable for that subtle back-of-the-throat heat.
The Formula: 1 Egg Yolk to 4-5 Tablespoons of Butter. If you use too much butter, the emulsion will collapse; too little, and it will taste like a lemon-flavored omelet.
Method 1: The Easy Hollandaise Sauce Blender Technique
The 2-Minute Blender Hollandaise
Ingredients:
- 3 large egg yolks (room temperature)
- 1 tablespoon fresh lemon juice
- 1/2 teaspoon salt
- 1/8 teaspoon cayenne pepper
- 1/2 cup (1 stick) unsalted butter
Instructions:
- Prep the Base: Place the egg yolks, lemon juice, salt, and cayenne in the jar of a standard blender or a tall, narrow container if using an immersion blender.
- Heat the Butter: Melt the butter in a small saucepan until it is bubbling and hot. Use a kitchen thermometer to ensure it reaches exactly 175°F (80°C). This is the "secret" temperature—it's hot enough to cook the yolks on contact for safety, but not so hot that it scrambles them instantly.
- The Slow Drizzle: Turn the blender on its lowest setting. With the motor running, very slowly drizzle the hot butter into the egg mixture in a thin, steady stream.
- The Finish: Once all the butter is incorporated, the sauce should be thick and pale yellow. Taste and adjust for salt and acid.
Temperature Control: The Secret to No Scrambling
Method 2: The Microwave Method for Busy Mornings
The Microwave Shortcut Hollandaise
Instructions:
- Whisk 2 egg yolks, 1 tablespoon of lemon juice, and 2 tablespoons of water in a heavy glass bowl (Pyrex works best for heat retention).
- Whisk in 1/2 cup of cold, cubed butter.
- Microwave on 50% power for 15 seconds. Remove and whisk vigorously for 10 seconds.
- Repeat this process in 15-second intervals. As the butter melts, the sauce will begin to thicken.
- Stop when the sauce reaches the "nappe" stage—where it is thick enough to coat the back of a spoon. This usually takes 3 to 4 intervals.
Common Pitfalls: Why Hollandaise Breaks and How to Avoid It
Even with these shortcuts, hollandaise can be a bit of a diva. Understanding the difference between a "split" sauce and a "curdled" sauce is the first step toward mastery.
The Temperature Trap
Adding Fat Too Fast
This is the #1 reason for failure. You must think of the first 2 tablespoons of butter as the "foundation." If you dump it all in at once, the lecithin in the yolks becomes overwhelmed and cannot trap the fat droplets. Use a "slow drizzle" that is no thicker than a pencil lead.
The Rescue Guide: How to Fix a Broken Hollandaise
- The Boiling Water Trick: Place a teaspoon of boiling water in a clean bowl. Very slowly, whisk the broken sauce into the water, one drop at a time. The heat and moisture often help the proteins realign.
- The Fresh Yolk Reset: If the water trick fails, place a fresh egg yolk in a clean blender or bowl. Slowly whisk the broken sauce into the new yolk. This provides a fresh dose of emulsifiers to pick up the slack.
- The Blender Pulse Save: Sometimes, a sauce that has just started to separate can be saved by adding a teaspoon of very cold water and pulsing the blender three or four times.
For more detailed visual cues, consider checking out this guide on how to fix a broken hollandaise sauce. It has saved my brunch more than once!
Serving and Storage Tips for the Home Cook
Hollandaise is best served immediately, but life happens. If your guests are running late, you need a strategy.
The Thermos Hack
Safety and Reheating
Due to the safe handling of raw eggs guidelines provided by the USDA, you should never keep hollandaise at room temperature for more than two hours. Reheating is tricky because direct heat will almost always scramble the eggs. If you must reheat, do it in a bowl set over a bowl of warm (not boiling) tap water, whisking constantly.
Creative Pairings
Expert Testing Notes: Our CookBuddyGuide Secrets
- The Cold Water Drop: If you feel your sauce is getting too thick or looks like it's about to break from heat, whisk in a single ice cube or a teaspoon of ice-cold water. This immediately drops the temperature and stabilizes the emulsion.
- The Immersion Blender Advantage: If you are making a small batch (for 2 people), use an immersion blender in a cup that is only slightly wider than the blender head. This creates a powerful vortex that pulls the butter down into the blades perfectly.
A: Usually, this means the butter wasn't hot enough. You can try whisking it over a very low flame for 30 seconds, but be careful! Alternatively, add another half-stick of melted (hot) butter very slowly.
A: Hollandaise relies on the lecithin in egg yolks and the fats in butter. While there are vegan "creamy sauces," they technically aren't hollandaise. You would need to use a commercial egg replacer and vegan butter, but the flavor profile will be significantly different.
Conclusion: Master the Mother Sauce
Making a hollandaise without double boiler isn't just a kitchen shortcut—it's a smarter way to cook. By understanding the emulsification process and utilizing tools like the easy hollandaise sauce blender method, you remove the stress from one of the most intimidating sauces in French cuisine.
The next time you're planning a Sunday morning feast, remember: keep your butter hot, your drizzle slow, and your whisk ready. You’ve got this! If you enjoyed this guide, be sure to check out our other breakfast meal prep ideas to make your mornings even smoother. Happy cooking!