Quick Answer
Master this homemade baked beans recipe using dried navy beans. It also explains to make baked beans from scratch no can for a rich, smoky flavor that beats any tin.
Practical note
For A Practical Homemade Baked Beans Recipe, this guide centers on Brine, Sauté, Combine. Those are the checkpoints we would use first in a normal home kitchen before making a bigger change.
Decision table
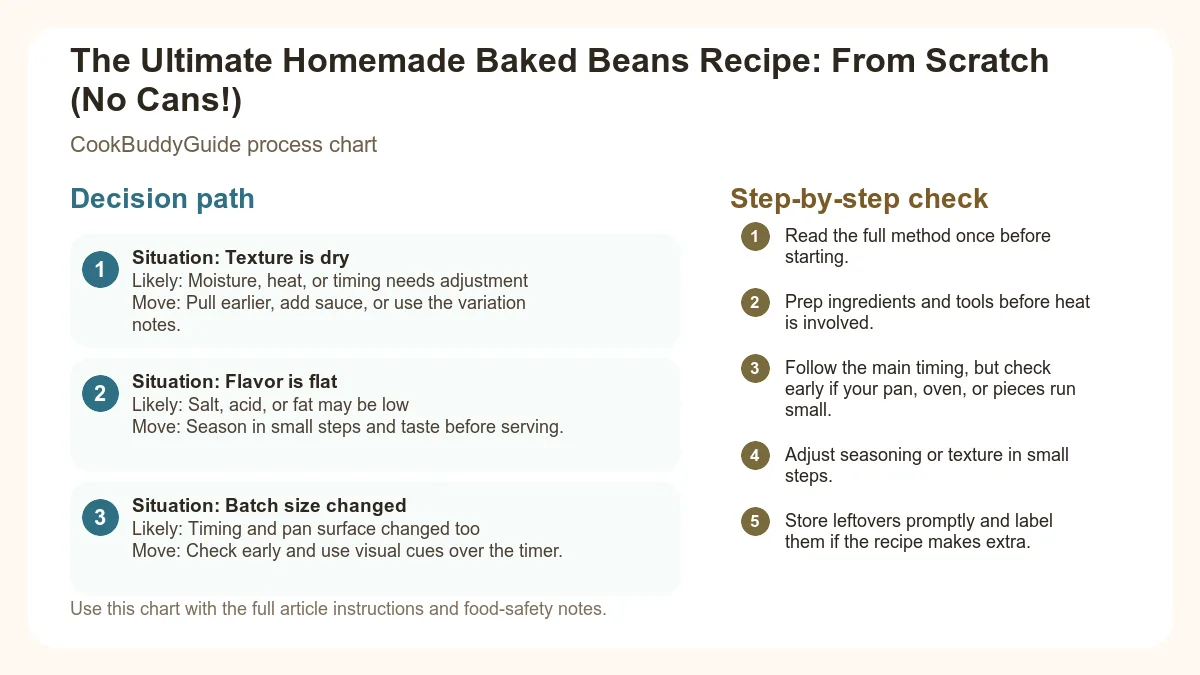
| Situation | Likely cause or meaning | Best move |
|---|---|---|
| Texture is dry | Moisture, heat, or timing needs adjustment | Pull earlier, add sauce, or use the variation notes. |
| Flavor is flat | Salt, acid, or fat may be low | Season in small steps and taste before serving. |
| Batch size changed | Timing and pan surface changed too | Check early and use visual cues over the timer. |
Step-by-step fix
- Read the full method once before starting.
- Prep ingredients and tools before heat is involved.
- Follow the main timing, but check early if your pan, oven, or pieces run small.
- Adjust seasoning or texture in small steps.
- Store leftovers promptly and label them if the recipe makes extra.
Common mistakes
- Changing the recipe before trying the base method once.
- Measuring casually when texture depends on ratios.
- Waiting until the end to fix seasoning.
- Ignoring carryover heat or resting time.
Related topic hubs
The problem with canned beans isn't just the preservatives; it's the texture. Canned beans are often mushy, swimming in a thin, overly saccharine syrup that lacks complexity. When you make baked beans from scratch no can, you are in the driver's seat. You control the bite of the bean, the depth of the smoke, and the balance of tang and sugar. This guide will walk you through the science of the soak, the importance of the Maillard reaction in your Dutch oven, and why you should never, ever add your vinegar too early.
- Why Making Baked Beans From Scratch is a Helpful Shortcut
- The Foundation: Choosing and Prepping Your Beans
- Building the Flavor Profile: The Sauce Components
- The Traditional Dutch Oven Method (Step-by-Step)
- The Busy Cook’s Alternative: Slow Cooker Instructions
- Troubleshooting Common Baked Bean Blunders
- Customizing Your Recipe
- Make-Ahead, Storage, and Reheating Tips
Why Making Baked Beans From Scratch is a Helpful Shortcut
The Texture Difference: Canned vs. Dried
Total Control Over Sugar and Sodium
Have you ever looked at the back of a bean can? The sugar content is staggering. When you develop your own homemade baked beans recipe, you can layer sweetness using high-quality ingredients like unsulfured molasses or dark brown sugar, rather than high-fructose corn syrup. Furthermore, you can manage the salt levels. Since we’ll be using salt pork or bacon, we need to be careful with added salt. Making them yourself allows you to season to your specific palate. Plus, buying beans in bulk is a fantastic way to create cheap meals under five dollars that can feed a whole neighborhood gathering.
The Foundation: Choosing and Prepping Your Beans
Why Navy Beans are the Gold Standard
While you can technically bake any bean, Navy beans (also known as pea beans) are the traditional choice for a reason. These small, white, oval-shaped legumes have a relatively thin skin and a mild flavor that acts as a blank canvas for the sauce. They hold their shape remarkably well during a 6-hour simmer. If you cannot find Navy beans, Great Northern beans are a suitable substitute, though they are slightly larger and may require a bit more cooking time. For more on why these beans are a nutritional powerhouse, check out the nutritional benefits of legumes.
The Overnight Soak vs. The Quick Soak Method
The Secret of Salt Brining for Tender Skins
This is the "pro tip" that changed my bean game forever. Most old-school cookbooks tell you never to salt your beans until they are soft. Science tells us otherwise. Adding about 1.5 tablespoons of kosher salt to your soaking water (a salt brine) actually helps the skins soften. The sodium ions replace some of the calcium and magnesium in the bean skins, making them more permeable and less likely to rupture during the long bake. Just be sure to rinse the beans thoroughly after the soak to remove the excess salt before you start the actual cooking process.
Building the Flavor Profile: The Sauce Components
The Sweet: Balancing Molasses and Brown Sugar
The Tang: Yellow Mustard and Apple Cider Vinegar
Without acidity, baked beans are just a heavy, sugary mess. Use two types of acid: dry mustard (or yellow mustard) and apple cider vinegar. The mustard provides a subtle heat and acts as an emulsifier for the sauce. The vinegar, however, is the most critical component. It cuts through the fat of the pork and the heaviness of the sugar. Note: Always add the bulk of your vinegar at the very end of the cooking process (see the Troubleshooting section for why).
The Smoke: Choosing the Right Bacon or Salt Pork
A Practical Dutch Oven Baked Beans
Ingredients:
- 1 lb dried Navy beans (rinsed and sorted)
- 6 oz salt pork, diced (or 6 slices thick-cut bacon)
- 1 large yellow onion, finely chopped
- 1/2 cup unsulfured molasses
- 1/2 cup dark brown sugar, packed
- 2 tsp dry mustard
- 1/4 tsp ground cloves (the secret ingredient!)
- 1/2 tsp black pepper
- 2 tbsp apple cider vinegar (plus more to taste)
- 4-5 cups water (or low-sodium chicken stock)
Instructions:
- Brine: Soak beans overnight in salted water. Drain and rinse.
- Sauté: In a large Dutch oven, cook the salt pork or bacon over medium heat until the fat renders. Add the onion and cook until translucent.
- Combine: Add the soaked beans, molasses, brown sugar, mustard, cloves, and pepper. Stir to coat the beans.
- Liquid: Pour in enough water to cover the beans by about 1 inch.
- Bake: Cover with a tight-fitting lid and bake at 300°F (150°C) for 4 hours. Check every hour; if the liquid drops below the bean line, add a splash of boiling water.
- Finish: Remove the lid. Stir in the apple cider vinegar. Bake for another 1-2 hours uncovered until the sauce is thick and the beans are tender.
The Traditional Dutch Oven Method (Step-by-Step)
Searing the Aromatics
When you begin your baked beans from scratch no can, don't just dump everything in the pot. Start by rendering your fat. Whether you use a bean pot or a heavy-bottomed Dutch oven, getting the onions slightly caramelized in the pork fat creates a base of flavor that you can't get from a slow cooker. This is where the Maillard reaction begins—the chemical reaction between amino acids and reducing sugars that gives browned food its distinctive flavor. For more tips on this technique, see this guide on cooking beans in a Dutch oven.
The Low and Slow Bake: Temperature and Timing
When to Keep the Lid On vs. Off
Keep the lid on for the first 75% of the cooking time. This creates a steam-filled environment that ensures the beans cook through. Once the beans are soft to the bite, remove the lid. This allows evaporation to occur, transforming the thin liquid into a mahogany-colored, thick sauce that coats the back of a spoon. If the sauce gets too thick before the beans are done, simply add a half-cup of water and put the lid back on.
The Busy Cook’s Alternative: Slow Cooker Instructions
Adjusting Liquid for the Crockpot
If you’re looking for crockpot freezer meals or easy set-and-forget sides, the slow cooker is a viable option. However, there is a major catch: zero evaporation. In an oven, the dry air pulls moisture out of the pot. In a slow cooker, the lid traps every drop of steam. To avoid "bean soup," reduce your initial water by 1.5 cups. You can always add more later, but you can't easily take it away.
Setting the Timer for Success
Cook on LOW for 8-10 hours. Avoid using the HIGH setting for dried beans, as it can result in uneven cooking where the outside is mushy and the center is still chalky. If the sauce is too thin at the end of the 10 hours, vent the lid (propping it open with a wooden spoon) and cook on high for the final hour to help the sauce reduce.
Troubleshooting Common Baked Bean Blunders
This is the most common frustration. There are usually two culprits: old beans or hard water. Dried beans don't last forever; if they've been sitting in your pantry for three years, they may never soften. Additionally, hard water contains high levels of calcium which reinforces the bean's cell walls. If you have hard water, use bottled or filtered water for your beans.
This is a scientific "must-know." Acid (like vinegar, lemon juice, or even tomato sauce) binds to the pectin in the bean skins, making them stay hard. If you add your apple cider vinegar at the beginning of the 6-hour bake, your beans will likely stay crunchy forever. Always wait until the beans are fully tender before introducing the vinegar. For a deeper dive into this, read about the science of bean texture.
Customizing Your Recipe
Spicing it Up: Jalapeños and Cayenne
Bourbon-Infused Baked Beans
Make-Ahead, Storage, and Reheating Tips
Why Baked Beans Taste Better the Next Day
How to Reheat Without Drying Out
When you pull your beans out of the fridge, they will likely look like a solid block of mahogany-colored gelatin. Don't panic! This is just the starch and sugar setting. To reheat, place them in a saucepan over low heat and add a "splash" (about 2-3 tablespoons) of water or apple juice. This will loosen the sauce back to its original glory. Always ensure you are safely reheating leftovers to an internal temperature of 165°F.
Freezing Instructions for Long-Term Prep
Baked beans freeze beautifully. Often, make a double batch and freeze half in quart-sized freezer bags. They will last for up to 3 months. To serve, thaw them overnight in the refrigerator and reheat on the stovetop. The texture remains remarkably consistent, making this an ideal "make-ahead" side dish for busy summer months.
Conclusion: The Reward of Patience
Making baked beans from scratch no can is not about convenience; it’s about the ritual and the result. It’s a slow-motion transformation of humble dried beans into a complex, rich, and deeply satisfying dish that anchors any meal. Whether you’re serving these alongside a 12-hour smoked brisket or just some simple grilled hot dogs, the effort you put into the soak, the sear, and the long bake will be evident in every bite. So, put away the can opener, dust off your Dutch oven, and reclaim the glory of the homemade bean. Your guests—and your taste buds—will thank you.