Quick Answer
Host the perfect holiday cookie exchange in this guide! Discover Christmas cookie exchange ideas recipes, packaging tips, and 8 crowd-pleasing treats.
Practical note
For A Practical Holiday Cookie Exchange Guide, this guide centers on Homemade Only, Recipe Sign-up, Packaging. Those are the checkpoints we would use first in a normal home kitchen before making a bigger change.
Decision table
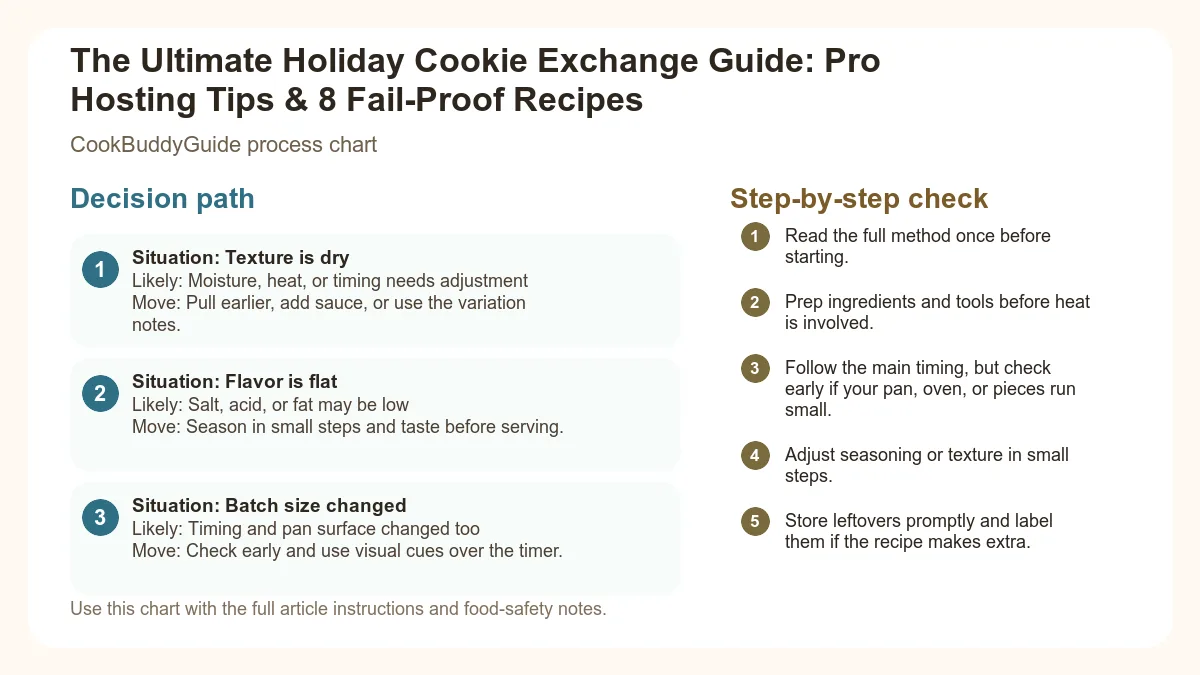
| Situation | Likely cause or meaning | Best move |
|---|---|---|
| Texture is dry | Moisture, heat, or timing needs adjustment | Pull earlier, add sauce, or use the variation notes. |
| Flavor is flat | Salt, acid, or fat may be low | Season in small steps and taste before serving. |
| Batch size changed | Timing and pan surface changed too | Check early and use visual cues over the timer. |
Step-by-step fix
- Read the full method once before starting.
- Prep ingredients and tools before heat is involved.
- Follow the main timing, but check early if your pan, oven, or pieces run small.
- Adjust seasoning or texture in small steps.
- Store leftovers promptly and label them if the recipe makes extra.
Common mistakes
- Changing the recipe before trying the base method once.
- Measuring casually when texture depends on ratios.
- Waiting until the end to fix seasoning.
- Ignoring carryover heat or resting time.
Related topic hubs
Table of Contents
- Why the Holiday Cookie Exchange is the Ultimate Tradition
- How to Organize a Stress-Free Cookie Swap
- The Math of Baking: How Many Cookies Do You Need?
- 8 Standout Recipes That Travel Well
- Practical Tips for Baking Success
- Packaging and Presentation
- Labeling and Food Safety
- The Day of the Event: Hosting Logistics
Why the Holiday Cookie Exchange is the Ultimate Festive Tradition
The Magic of the Cookie Swap
How a Cookie Exchange Saves Time for Busy Bakers
For the busy home cook, the holiday cookie exchange is a productivity hack. If you were to bake six types of cookies at home, you’d be looking at six different grocery lists, six different dough-chilling schedules, and a week of batch baking. By focusing on one recipe, you can streamline your process. You buy flour in bulk, set up an assembly line on your baking sheet, and master one specific technique. It’s the ultimate way to fill your pantry with festive treats without losing your mind.How to Organize a Stress-Free Cookie Swap
Setting the Date and Guest List
The Invitation: Communicating the Rules
- Homemade Only: No store-bought dough. The effort is the currency of the swap.
- Recipe Sign-up: Ask guests to declare their cookie type 10 days in advance.
- Packaging: Remind them to bring airtight containers or boxes to transport their loot home.
Managing the RSVP and Recipe Sign-ups
The Math of Baking: How Many Cookies Do You Actually Need?
Calculating the 'Dozen Per Person' Rule
The standard holiday cookie exchange math is simple: each guest brings one dozen cookies for every other guest. If 10 people are attending, everyone brings 10 dozen cookies. This ensures everyone goes home with a full dozen of each variety.Buffer Cookies: Why You Should Always Bake Extra
- The Tasting Platter: You don't want guests dipping into the exchange piles to eat. Provide a separate platter for snacking.
- Breakage: Even the sturdiest shortbread can succumb to a dropped baking sheet.
- The "Host Gift": It's a nice gesture for guests to leave one or two extra for the host.
Sample Math for Groups
- Group of 6: Bring 6 dozen (72 cookies). Each person takes home 12 of 6 different kinds.
- Group of 10: Bring 10 dozen (120 cookies). Each person takes home 12 of 10 different kinds.
- Group of 15: This is where Consider "Half-Dozen Rules." Everyone brings 7.5 dozen, and guests take home 6 of each kind. 15 dozen is a lot for one person to bake in a standard home kitchen!
8 Standout Recipes That Travel Well and Look Impressive
1. Classic Decorated Sugar Cookies with Royal Icing
The cornerstone of any christmas cookie exchange ideas recipes list. The secret here is the "no-spread" dough. Use a high-protein flour and skip the leavening agents (baking powder/soda) to ensure the shapes stay sharp.
2. Peppermint Bark Shortbread Cookies
This is a hybrid of a buttery shortbread and confectionery bark. I dip half of each rectangular cookie into tempered dark chocolate and sprinkle with crushed candy canes. Testing Note: To ensure the chocolate doesn't melt in the airtight containers, you must temper your chocolate or use high-quality melting wafers. This prevents the "bloom" (white streaks) and keeps the snap.
3. Raspberry Jam Thumbprints with Almond Glaze
4. Buttery Vanilla Bean Shortbread Wedges
Shortbread is all about the ratio. Understanding the science of buttery shortbread is key to that melt-in-your-mouth texture. Use a 3:2:1 ratio of flour, butter, and sugar by weight. Using a cooling rack is vital here; if they sit in the pan, they’ll become greasy as they cool.
5. Salted Caramel Dark Chocolate Chunk Cookies
These are the "crowd pleasers." Use a mix of chopped chocolate bars and chips for varying textures. The key is a generous sprinkle of Maldon sea salt immediately after they come out of the oven to balance the rich caramel notes.
6. Soft Ginger Molasses Cookies
These travel incredibly well because they are naturally moist. Use both ground ginger and finely minced crystallized ginger for a double hit of spice. They actually taste better on day two, making them perfect for a cookie swap.
7. White Chocolate Cranberry Pistachio Biscotti
Biscotti are the tanks of the cookie world. They are nearly impossible to break during transport. The red cranberries and green pistachios make them naturally festive without needing extra decoration.
8. Lemon Glazed Ricotta Cookies
These are like tiny, fluffy cakes. Because they are soft, they must be layered with parchment paper between each row to prevent sticking. The lemon zest provides a much-needed acidic break from all the chocolate and caramel.
Practical Tips for Baking Success: Lessons from the CookBuddy Kitchen
The Importance of Room Temperature Ingredients
Why You Must Chill Your Dough
Patience is an ingredient. Chilling dough for at least 2 hours (or overnight) allows the flour to fully hydrate and the fats to solidify. This results in a deeper flavor and a cookie that holds its shape. When you're batch baking, consider having one tray in the oven, one tray cooling, and one tray of dough chilling in the fridge at all times.Common Mistakes: Over-mixing and Oven Hot Spots
Over-mixing develops gluten, which is great for bread but terrible for cookies. Mix until the flour just disappears. Also, every oven has hot spots. Consider using an oven thermometer. If your oven says 350°F but is actually 375°F, your festive treats will be burnt on the bottom before they are cooked in the middle. And a final safety note: as tempting as it is to lick the spoon, remember the risks of handling raw flour safely. Raw flour can harbor bacteria just like raw eggs, so keep the "sampling" to the baked versions!Packaging and Presentation: Making Your Cookies Look Professional
Choosing the Right Containers
When it comes to edible gifts, the container matters. Airtight containers are the gold standard for maintaining freshness. If you use decorative window boxes, ensure the cookies are wrapped in cellophane or a freezer bag inside the box. Tin containers are classic and offer the best protection against crushing.Layering Techniques to Prevent Breakage
Festive Finishing Touches
Presentation is 50% of the gift. A useful option is to use:- Baker's twine in red and white.
- Fresh rosemary sprigs (they look like mini evergreen branches).
- Custom recipe cards tucked into the ribbon.
- Eco-friendly options like glass mason jars or fabric Furoshiki wraps.
Labeling and Food Safety: Managing Allergens
The Essential Recipe Card Template
Every guest should provide a recipe card. Not only is this a lovely keepsake, but it's a vital safety tool. Your card should include the cookie name, your name, the year, and a full list of ingredients.How to Clearly Mark Common Allergens
With the rise of food sensitivities, transparency is key. When preparing your holiday cookie exchange labels, clearly highlight the "Big 9" allergens. You can find more information on identifying common food allergens to ensure your labels are accurate.- Nuts: Specify if it's peanuts or tree nuts (walnuts, pecans, etc.).
- Dairy/Eggs: Essential for vegan guests.
- Gluten: Mark clearly if you used a gluten-free flour blend.
Storage Instructions for the Recipients
Don't let your hard work go to waste! On your label, include storage instructions: "Store in an airtight container for 5 days, or freeze for up to 3 months." This helps your friends enjoy their holiday dessert at its peak. After a long day of batch baking for your swap, the last thing you want to do is cook a complex meal. Rely on simple five ingredient dinner recipes or one of these sheet pan dinner ideas during a busy baking week.The Day of the Event: Hosting Logistics
Setting Up the Display Table
Clear your largest table or kitchen island. Arrange the cookies by texture—keep the hard, crunchy cookies like biscotti at one end and the soft, delicate ones like lemon ricotta at the other. This prevents "flavor contamination." Use tiered stands to create height and make the display look like a professional confectionery shop.The Tasting Station: Drinks and Savory Snacks
The 'Great Swap' Procedure
Once everyone has arrived and had a chance to snack, it’s time for the swap. A useful option is to do a "Cookie Parade." Each person stands by their cookies, explains the recipe development (why they chose it, any family history), and mentions any allergens. Then, we go around the table in a circle, and everyone takes their allotted amount. This keeps things orderly and ensures no one misses out on a specific variety.Holiday Cookie Exchange FAQ
A: Absolutely! The holiday cookie exchange is about community. Choose a simple recipe like a shortbread or a drop cookie. Focus on quality ingredients, and you'll be fine.
A: Most cookies are best within 3 days. However, you can make your dough weeks in advance, freeze it in balls, and bake them the day before the swap for maximum freshness.
A: Most cookies freeze beautifully. Wrap them tightly in plastic wrap and place them in a freezer bag. They’ll stay fresh for up to 3 months—perfect for a mid-January treat!