Quick Answer
This guide explains how to make focaccia bread with this easy no-knead homemade focaccia recipe. Master the high-hydration technique for a crispy bottom and fluffy center.
Practical note
For How to Make Focaccia Bread, the most useful home checks are temperature, measuring, resting time, and visible texture. Those details tell you more than guessing, especially before adding extra flour, liquid, heat, or leavening.
Decision table
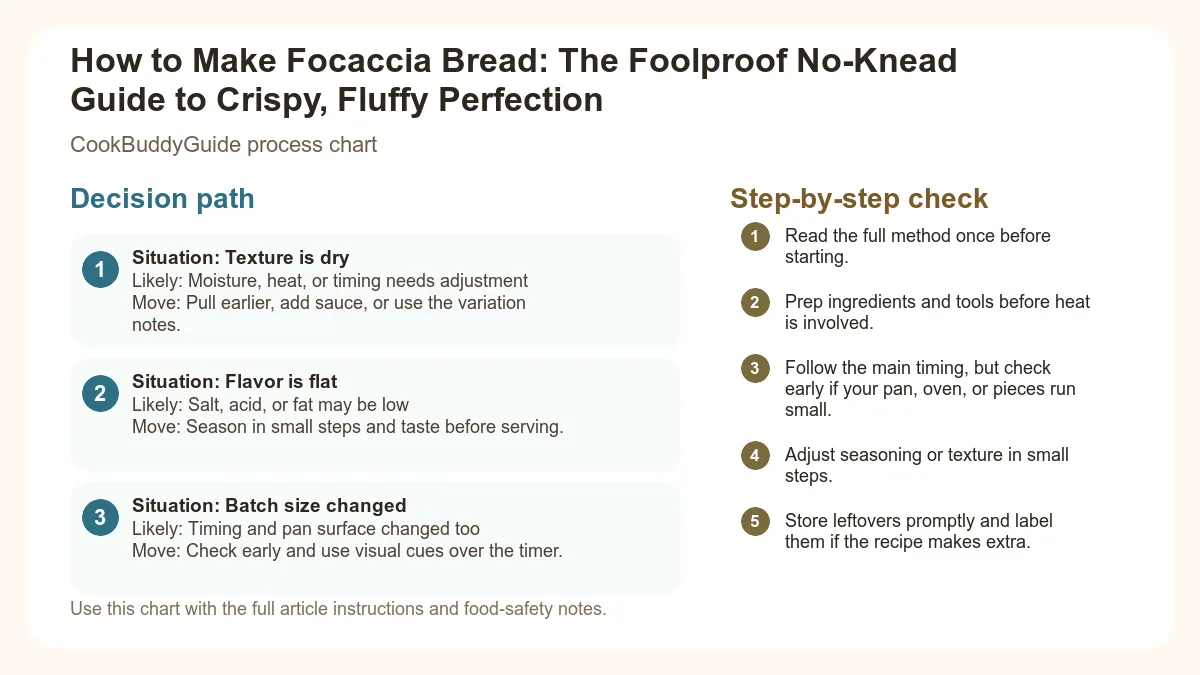
| Situation | Likely cause or meaning | Best move |
|---|---|---|
| Texture is dry | Moisture, heat, or timing needs adjustment | Pull earlier, add sauce, or use the variation notes. |
| Flavor is flat | Salt, acid, or fat may be low | Season in small steps and taste before serving. |
| Batch size changed | Timing and pan surface changed too | Check early and use visual cues over the timer. |
Step-by-step fix
- Read the full method once before starting.
- Prep ingredients and tools before heat is involved.
- Follow the main timing, but check early if your pan, oven, or pieces run small.
- Adjust seasoning or texture in small steps.
- Store leftovers promptly and label them if the recipe makes extra.
Common mistakes
- Changing the recipe before trying the base method once.
- Measuring casually when texture depends on ratios.
- Waiting until the end to fix seasoning.
- Ignoring carryover heat or resting time.
Related topic hubs
Table of Contents
- Why This No-Knead Focaccia is a Helpful Shortcut
- Essential Ingredients for Professional Results
- Step-by-Step: The Master Method
- The Secret to the Perfect Crispy Bottom Crust
- Mastering the Dimpling Technique and Brine
- Creative Topping Ideas: Classic to Gourmet
- Troubleshooting Common Focaccia Failures
- Storage, Reheating, and Serving Suggestions
Why This No-Knead Focaccia is a Helpful Shortcut for Home Cooks
Most beginners think that great bread requires hours of vigorous kneading. In reality, the most sought-after texture in Italian baking—the open crumb structure—is actually hindered by over-handling. When we talk about how to make focaccia bread, we are really talking about managing time and water.
The Science of High Hydration Dough
Why No-Knead Results in Better Texture
When you knead dough, you create a tight, organized web of gluten. While great for a sandwich loaf, it can make focaccia feel "tough." By using the no-knead focaccia dough technique, we allow yeast fermentation to do the heavy lifting. As the yeast consumes sugars and releases carbon dioxide, those gas bubbles gently stretch the gluten over 12 to 24 hours. This "passive kneading" creates a delicate, lace-like structure that is incredibly light. It’s a "hands-off" but "time-on" recipe; you spend maybe 10 minutes of active work, but the fridge does the rest of the labor for you.
Essential Ingredients for a Professional Homemade Focaccia Recipe
Flour Selection: Bread Flour vs. All-Purpose
While you can use all-purpose flour, consider a high-protein bread flour. Look for a bread flour protein content of at least 12.7%. The higher protein provides the structural integrity needed to hold onto those large gas bubbles during the long proofing stage. If the protein is too low, your bread may collapse under the weight of the olive oil and toppings, leading to a dense layer at the bottom.
The Liquid Gold: Why Olive Oil Quality Matters
Yeast, Salt, and Water Temperature
When choosing your leavening agent, understand the difference between instant yeast vs active dry. Instant yeast can be mixed directly into the flour, whereas active dry needs to be bloomed in warm water first. Choose instant for its reliability. For salt, Use fine sea salt in the dough for even distribution and Maldon sea salt flakes for the top to provide that essential crunch. Always use a kitchen scale—measuring by grams is the only way to ensure your hydration doesn't slip from 80% to 70% because of a packed measuring cup.
The Master No-Knead Focaccia Recipe
Ingredients:
- 500g Bread Flour (approx. 4 cups)
- 400g Lukewarm Water (approx. 1 ¾ cups)
- 10g Fine Sea Salt (2 tsp)
- 4g Instant Yeast (1 tsp)
- 50g Extra Virgin Olive Oil (for the dough and pan)
- Maldon Sea Salt for finishing
Instructions: Mix flour, salt, and yeast. Add water and 10g of oil. Stir until a shaggy mass forms. Cover and let rest for 30 minutes. Perform one set of "stretch and folds," then refrigerate for 12-24 hours for cold fermentation.
Step-by-Step: How to Make Focaccia Bread (The Master Method)
The process of making this homemade focaccia recipe is divided into distinct phases. Skipping the rest periods is the fastest way to ruin your crumb.
Mixing the Shaggy Dough
The First Rise: Room Temp vs. Cold Fermentation
Transferring to the Pan: The 'Fold and Tuck' Technique
The Secret to the Perfect Crispy Bottom Crust
The hallmark of a professional focaccia is a bottom that is so crispy it sounds like toast when you tap it. Achieving this requires overcoming the fear of fat.
Choosing the Right Pan (Metal vs. Ceramic)
The Generous Oil Technique
You need more oil than you think. You are essentially shallow-frying the bottom of the dough. According to tips for a crispy bottom crust, the oil acts as a heat transfer medium. Use about 2-3 tablespoons of oil just for the bottom of the pan. This creates a golden-brown, "fried" crust that contrasts beautifully with the soft interior.
The Lower Rack Positioning
Most recipes tell you to bake in the center of the oven. I disagree. For the ultimate homemade focaccia recipe, bake on the lowest rack for the first 15 minutes. This puts the dough closest to the heating element, ensuring the bottom sets and crisps before the top gets too dark. If you have a pizza stone, place your sheet pan directly on top of it for even more intense heat transfer.
Mastering the Dimpling Technique and Final Proof
Dimpling is not just for aesthetics; it’s a functional part of how to make focaccia bread. It creates valleys for oil and brine to pool, and it prevents the bread from rising too tall like a standard loaf of white bread.
When to Dimple: The Fingerprint Test
Wait until the dough has filled the pan and looks "jiggly" like Jello. This usually takes 2-4 hours at room temperature for the final proofing. If you poke the dough and the indentation springs back immediately, it’s not ready. If it leaves a slow-filling divot, it’s time. This ensures you have the maximum open crumb structure inside.
The Art of the Deep Dimple
Oil your fingertips thoroughly to prevent sticking. Use both hands and press your fingers straight down until you feel the bottom of the pan. Don't be afraid! You want to create deep craters. This proper dimpling technique for focaccia ensures that the gases are redistributed evenly and the toppings have a place to sit. If you've done it right, the dough will look like a lunar landscape.
Creating Brine Pockets
The "Salty Brine" secret is what separates amateur focaccia from the Focaccia Genovese you find in Italy. Mix 1 teaspoon of sea salt with 2 tablespoons of warm water. Pour this focaccia brine over the dough after dimpling. The water will settle into the holes, creating little pockets of steam that keep the dimples soft while the rest of the crust gets crunchy. It also creates those iconic white salty pools on the finished bread.
Creative Topping Ideas: From Classic to Gourmet
Once you’ve mastered the base, the toppings are where you can express your creativity. However, timing and preparation are key to ensuring they don't burn.
- The Purist: Fresh rosemary and Maldon sea salt. Pro-tip: Soak your rosemary needles in olive oil for 10 minutes before adding them to the dough to prevent them from carbonizing in the hot oven.
- The Mediterranean: Pitted Kalamata olives, halved cherry tomatoes, and crumbled feta. Press the tomatoes cut-side down into the dimples so their juices seep into the bread.
- The Savory: Caramelized onions and a drizzle of balsamic glaze. Cook the onions completely before adding them; the oven time is only enough to warm them, not soften them.
- The Seasonal: Concord grapes and rosemary (a Tuscan classic called Schiacciata con l'uva) or thinly sliced Yukon Gold potatoes with thyme.
When adding toppings, always press them firmly into the dough. The "oven spring"—the final burst of rising that happens in the first 10 minutes of baking—will try to push the toppings out. If you don't bury them slightly, your olives will be rolling around the bottom of your oven.
Troubleshooting Common Focaccia Failures
Even careful cooks still get an occasional off batch. Here is how to fix the most common issues based on proofing for the best texture research.
This is usually due to under-proofing or using old yeast. If the dough doesn't look like a bubbling cauldron before it goes in the oven, it needs more time. Also, ensure your water isn't too hot (over 110°F), which can kill the yeast fermentation process.
Your oven might be running cold, or you didn't use enough oil. Try using a dark metal pan and moving the tray to the lowest rack. If it's already baked and soggy, you can put the slices in a dry skillet over medium heat for 2 minutes to crisp them up.
The gluten is too tight. This happens if the dough is cold or if it was handled too much. Cover it, wait 20 minutes, and try again. Never force the dough; let gravity and relaxation do the work.
Storage, Reheating, and Serving Suggestions
Focaccia is best eaten within 4 hours of baking, but life happens. If you have leftovers, do not put them in the fridge! The starch retrogradation happens fastest at fridge temperatures, making the bread stale and "rubbery."
How to Keep Focaccia Fresh
Store your bread in a paper bag at room temperature for up to two days. For longer storage, focaccia freezes beautifully. Slice it into squares, wrap them tightly in plastic wrap, and freeze for up to a month. To serve, bake the frozen slices at 375°F for 10 minutes until the edges are sizzling again.
The Best Way to Reheat for Maximum Crunch
Never use the microwave. It will turn your beautiful homemade focaccia recipe into a soggy sponge. The toaster oven is your best friend here. If you want to serve it with dinner, like one of my easy one-pot pasta recipes, simply pop the whole slab back into a 350°F oven for 5 minutes.
Focaccia as a Sandwich Base
Final Thoughts on Mastering the Bake
Learning how to make focaccia bread is a journey of sensory cues. You’ll start to recognize the specific smell of active yeast fermentation, the way the dough feels when the gluten development is just right, and the exact shade of mahogany that signals a perfect Maillard reaction. Don't be afraid of the oil, don't rush the rise, and most importantly, don't be afraid to get your hands messy during the dimpling phase. Once you hear that first crunch of a homemade crust, you'll never go back to store-bought bread again. Happy baking!